
 Summer Sale
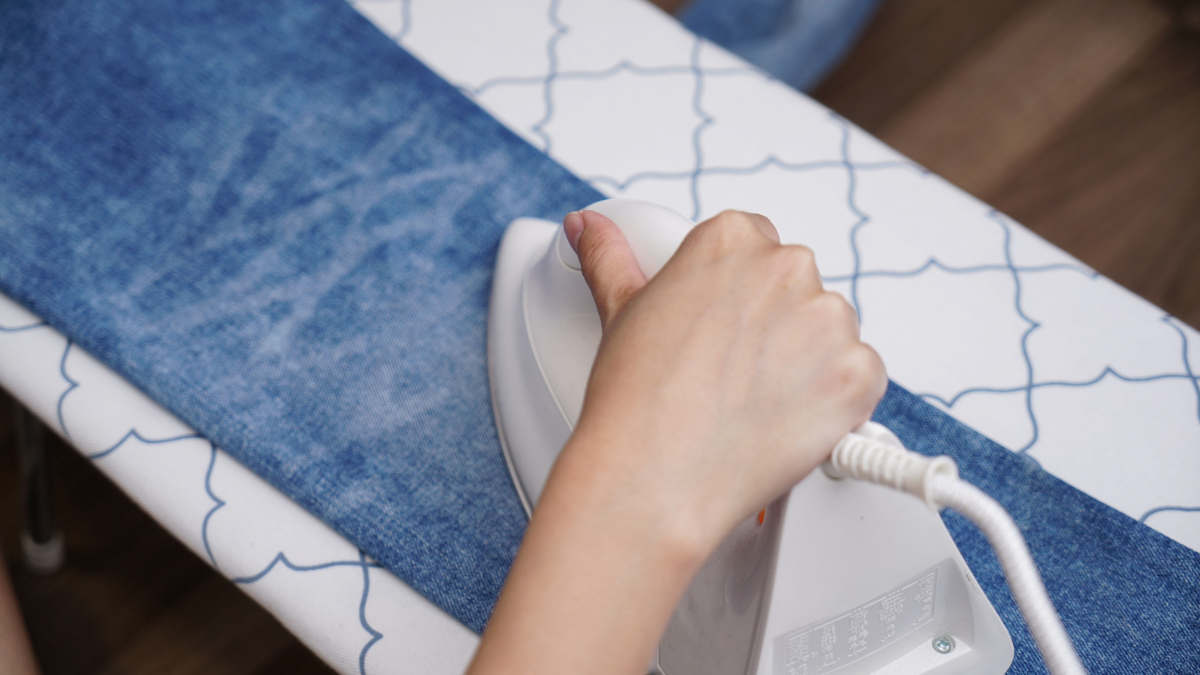
Wrinkled pants can make you look sloppy, even with a nice outfit. It's important to know how to get wrinkles out of your pants so you always look your best, whether you're going to work or a party.
Ironing has long been the standard way to get pants looking sharp and wrinkle-free. However, using a steam iron can take up a lot of time. Also, if you're not careful, you might leave shiny spots or even ruin delicate materials. Now, there are garment steamers like Neakasa that are faster and gentler. They make getting wrinkles out easier than ever before.
This guide will show you exactly how to iron pants. We'll cover everything from the tools you need and how to use them, to special tips for different fabrics, and even how to steam your pants. You'll learn the best way to keep your pants looking great.

Essential Tools for Ironing Pants
To achieve perfectly pressed pants, having the right tools is just as important as the technique. Whether you prefer traditional ironing or a more convenient steaming method, here are the essential tools you’ll need:
A Good Quality Iron: Invest in a reliable iron with adjustable temperature settings and a steam function. Look for features like automatic shut-off for safety and a non-stick soleplate for smooth gliding.
A Better Alternative: Neakasa Magic 1 Vacuum Steamer
While ironing is effective, it’s not always the most convenient method—especially when you're in a hurry or dealing with delicate fabrics. This is where a garment steamer comes in handy. The Neakasa Magic 1 Vacuum steamer offers:
✅ Fast heating – Ready to use in 30 seconds.
✅ Gentle on fabrics – No risk of scorching or shine marks.
✅ Effortless wrinkle removal – The built-in suction will hold the pants and steam them in one pass without an ironing board.
✅ Compact and travel-friendly – Ideal for quick touch-ups at home or on the go.

- AirIron Technology for Instant Wrinkle Removal.
- Effortless One-Handed Operation, Safe & Easy.
- Triple the Speed, Triple the Results.

Which Tool Should You Choose?
Step-by-Step Guide to Ironing Pants
Step 1. Set Up Your Ironing or Steaming Station
- For an iron: Place your ironing board on a stable surface and set your iron to the correct temperature based on the fabric label.
- For a steamer: Hang your pants on a sturdy hanger and fill your Neakasa steamer with water, allowing it to heat up.
Step 2. Iron or Steam the Pockets First
- Turn the pants inside out.
- For an iron: Place a pressing cloth over the pocket area and press lightly to avoid leaving imprints.
- For a steamer: Hold the steamer a few inches away and gently steam the inside pockets to relax wrinkles.
Step 3. Smooth Out the Waistband
- For an iron: Lay the waistband flat on the ironing board and press from one side to the other.
- For a steamer: Run the steamer along the waistband while slightly pulling the fabric taut.
Step 4. Iron or Steam the Pants Legs
- Fold one leg flat on the ironing board.
- For an iron: Use smooth, even strokes, starting from the top and moving downward. Avoid pressing too hard to prevent shine marks.
- For a steamer: Hold the pants from the waistband and glide the steamer down the leg, allowing gravity to help remove wrinkles.
Step 5. Creating or Maintaining Creases (If Needed)
For dress pants, a sharp crease can enhance the professional look.
- For an iron: Fold the pant leg along the existing crease, press gently, and hold for a few seconds. Use a pressing cloth to avoid shine marks.
- For a steamer: Run the steamer along the crease while lightly pinching the fabric to help define the fold.
Step 6. Final Touches and Hanging
- Check for any remaining wrinkles and touch up if necessary.
- Allow the pants to cool completely before wearing or storing to prevent re-wrinkling.
- For steamed pants: Hang them up immediately to let gravity further relax the fabric.
Ironing vs. Steaming – Which is Better?
- Ironing is best for structured fabrics and sharp creases.
- Steaming is faster, gentler, and perfect for delicate or casual pants.
- The Neakasa vacuum steamer is an excellent option for those who want an effortless, quick solution without needing an ironing board.
Now that you’ve mastered how to iron pants, let’s look at how to care for different fabrics to ensure the best results!
- AirIron Technology for Instant Wrinkle Removal.
- Effortless One-Handed Operation, Safe & Easy.
- Triple the Speed, Triple the Results.
Special Considerations for Different Fabrics
1. Cotton Pants
- Use a high heat setting.
- Steam is your friend - use plenty of it for stubborn wrinkles.
- Iron while slightly damp for best results.
- For extra crispness, consider using starch.
2. Wool Pants
3. Linen Pants
4. Synthetic Blends

Tips for Preventing Shine and Fabric Damage
How to Iron Pants Without An Iron - Best Alternatives
1. Handheld Garment Steamers: Quick & Fabric-Friendly
If you’re looking for a faster, easier, and safer alternative to ironing, a handheld garment steamer is the best choice. Unlike irons, which press down with direct heat, steamers use gentle steam to relax fibers, removing wrinkles without the risk of burning or shine marks.
✨ Why Choose the Neakasa Handheld Garment Steamer?
✔ Safe for all fabrics – Works on cotton, wool, linen, and even delicate synthetics without causing heat damage.
✔ No ironing board needed – Simply hang your pants and glide the steamer over them.
✔ Fast and convenient – Heats up in seconds, perfect for quick touch-ups.
✔ Prevents fabric shine – No direct contact means your wool dress pants stay smooth without glossy marks.
✔ Great for travel – Compact and portable, ideal for keeping pants wrinkle-free on the go.
🛠 How to Steam Pants Effectively:
- Hang your pants on a sturdy hanger.
- Fill your Neakasa steamer with water and let it heat up.
- Open suction mode and close to the pants, the steamer will hold the pants tightly.
- Steam gently in a vertical downward direction without repeatedly steaming back and forth.
- Let the pants cool and dry completely before wearing or storing them.
With Neakasa's advanced airiron technology, you can ditch the heavy iron and still achieve crisp, professional-looking pants in minutes.
- AirIron Technology for Instant Wrinkle Removal.
- Effortless One-Handed Operation, Safe & Easy.
- Triple the Speed, Triple the Results.
2. Wrinkle-release sprays and Hacks
If you need a quick fix without a steamer or iron, wrinkle-release sprays can help relax fabric fibers. These sprays are best for light wrinkles and casual pants like chinos and cotton trousers.
How to Use a Wrinkle-Release Spray:
- Lay the pants flat or hang them on a hanger.
- Lightly mist the fabric with the spray.
- Gently smooth out wrinkles with your hands.
- Let them air dry for a few minutes.
Pro Tip: If you don’t have a commercial wrinkle-release spray, mix water with a few drops of fabric softener in a spray bottle for a DIY version.
3. DIY Wrinkle-Removing Tricks
No steamer, no iron, and no spray? No problem! Try these household tricks to remove wrinkles naturally:
Steam in the Shower
- Hang your pants in the bathroom while taking a hot shower.
- The steam will help loosen wrinkles—just make sure the fabric doesn’t get wet!
Use a Dryer with a Damp Towel
- Toss your wrinkled pants in the dryer with a damp towel for 5-10 minutes.
- The steam from the towel will relax the wrinkles, making your pants look refreshed.
Press with Your Hands
- Lay the pants flat and use your hands to smooth out the wrinkles.
- Place a slightly damp towel over them and press down gently to help reshape the fabric

Conclusion
In this guide, we’ve explored the best practices for ironing pants, from essential tools and step-by-step techniques to fabric-specific care. Whether you choose to iron or steam, the goal is the same: achieving smooth, wrinkle-free pants without causing damage to delicate fabrics.
While traditional ironing can give you sharp results, a garment steamer like Neakasa is often the easier, faster, and safer option for most fabrics, especially when you're looking to save time or protect delicate materials. Upgrade your wrinkle-removal routine today and enjoy a smoother, easier way to care for your clothes!
Leave a comment
All comments are moderated before being published.
This site is protected by hCaptcha and the hCaptcha Privacy Policy and Terms of Service apply.